How to Fix Microphone Not Working on Laptop

Is your laptop microphone suddenly not working? It’s frustrating when you’re trying to join a call, record a voice message, or attend an important meeting, and your mic just won’t cooperate.
But don’t worry—you’re not alone, and this problem can usually be fixed quickly. You’ll discover simple and effective steps to get your microphone back up and running. Keep reading, because the solution might be easier than you think.
Check Hardware Connections
Checking hardware connections is the first step to fix a microphone not working on a laptop. Loose or damaged cables often cause the problem. Simple checks can save time and effort before moving to software fixes.
Inspect Microphone Jack And Ports
Look closely at the microphone jack and ports on your laptop. Dirt, dust, or debris can block the connection. Use a soft cloth or compressed air to clean them gently. Also, check if the microphone plug fits snugly into the port. A loose connection can stop sound from reaching your laptop.
Test With External Microphone
Try connecting an external microphone to your laptop. This step helps find out if the internal microphone is faulty. If the external mic works, the problem is likely with the built-in microphone. If not, the issue may be with your laptop’s audio system or settings.
Verify Microphone Settings
Checking your microphone settings is a key step to fix a laptop microphone not working. Incorrect settings often cause the microphone to be silent or unresponsive. This section helps you confirm and adjust the right settings for your microphone.
Set Default Recording Device
First, open the Sound settings on your laptop. Find the Recording tab to see all audio input devices. Look for your microphone in the list. Click on it and choose “Set as Default.” This action tells your laptop to use this microphone for sound input. Without this, your laptop may use another device by mistake.
Make sure the microphone is not disabled. Right-click on it and select “Enable” if needed. Then, test the microphone to check if it works after setting it as default.
Adjust Microphone Volume Levels
Next, check the microphone volume level. In the Recording tab, select your microphone and click on Properties. Go to the Levels tab. Here, you can raise the microphone volume. Sometimes, the volume is too low or muted, causing no sound to be picked up.
Set the volume to at least 75%. Avoid setting it to 100% to prevent noise. Speak into your microphone while adjusting. Watch the input meter to see if it picks up sound. Adjust until you see clear movement in the meter.
Update Audio Drivers
Updating audio drivers can fix many microphone issues on a laptop. Drivers control how your hardware works with your operating system. Outdated or damaged drivers can stop the microphone from working properly. Keeping drivers updated ensures your microphone performs well.
Use Device Manager
Open Device Manager by typing it in the Windows search bar. Find the “Sound, video and game controllers” section. Right-click your audio device and select “Update driver.” Choose “Search automatically for updated driver software.” Windows will look for the latest driver and install it. Restart your laptop to apply changes.
Download Drivers From Manufacturer
Visit the laptop or sound card manufacturer’s website. Go to the support or downloads section. Enter your laptop model or audio device details. Download the latest audio driver available for your system. Run the installer and follow the instructions. Restart your laptop after installation for best results.

Credit: support.microsoft.com
Run Troubleshooter Tools
Running troubleshooter tools is an easy way to fix microphone issues on your laptop. These tools check for common problems and fix them automatically. You do not need special skills. Just follow simple steps and let the software do the work. This saves time and effort.
Windows Audio Troubleshooter
Windows has a built-in audio troubleshooter. It helps find and fix microphone problems fast. To use it, open Settings and go to “Update & Security.” Then select “Troubleshoot” and click on “Additional troubleshooters.” Choose “Recording Audio” and start the troubleshooter. Follow the instructions on the screen. The tool tests your microphone and audio settings. It will fix many common problems automatically.
Third-party Diagnostic Software
Some third-party software can also help diagnose microphone issues. These tools often have more features than built-in troubleshooters. They check your hardware and driver status. Some popular apps include Driver Booster and Audio Troubleshooter by SoundCheck. Download and install trusted software only. Run the diagnostic tool and follow its advice. This can solve tricky microphone problems that Windows tools miss.
Check Privacy Settings
Privacy settings control which apps can use your laptop’s microphone. If your microphone is not working, these settings might be blocking access. Checking them helps you find and fix the issue quickly. This step is important for both Windows and Mac users.
Allow Microphone Access For Apps
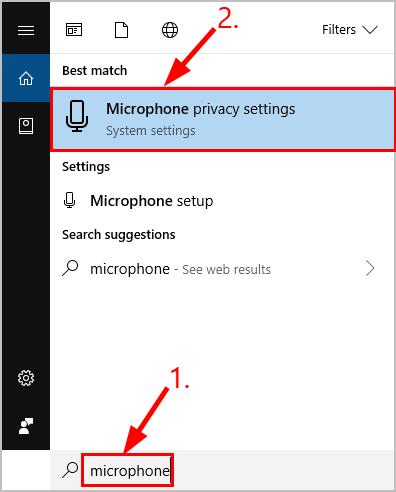
Start by opening your laptop’s settings. Find the privacy or security section. Look for the microphone settings. Make sure the microphone access is turned on.
Next, check the list of apps that can use the microphone. Enable access for the apps you want to use. Without permission, these apps cannot hear your voice.
Review System Privacy Permissions
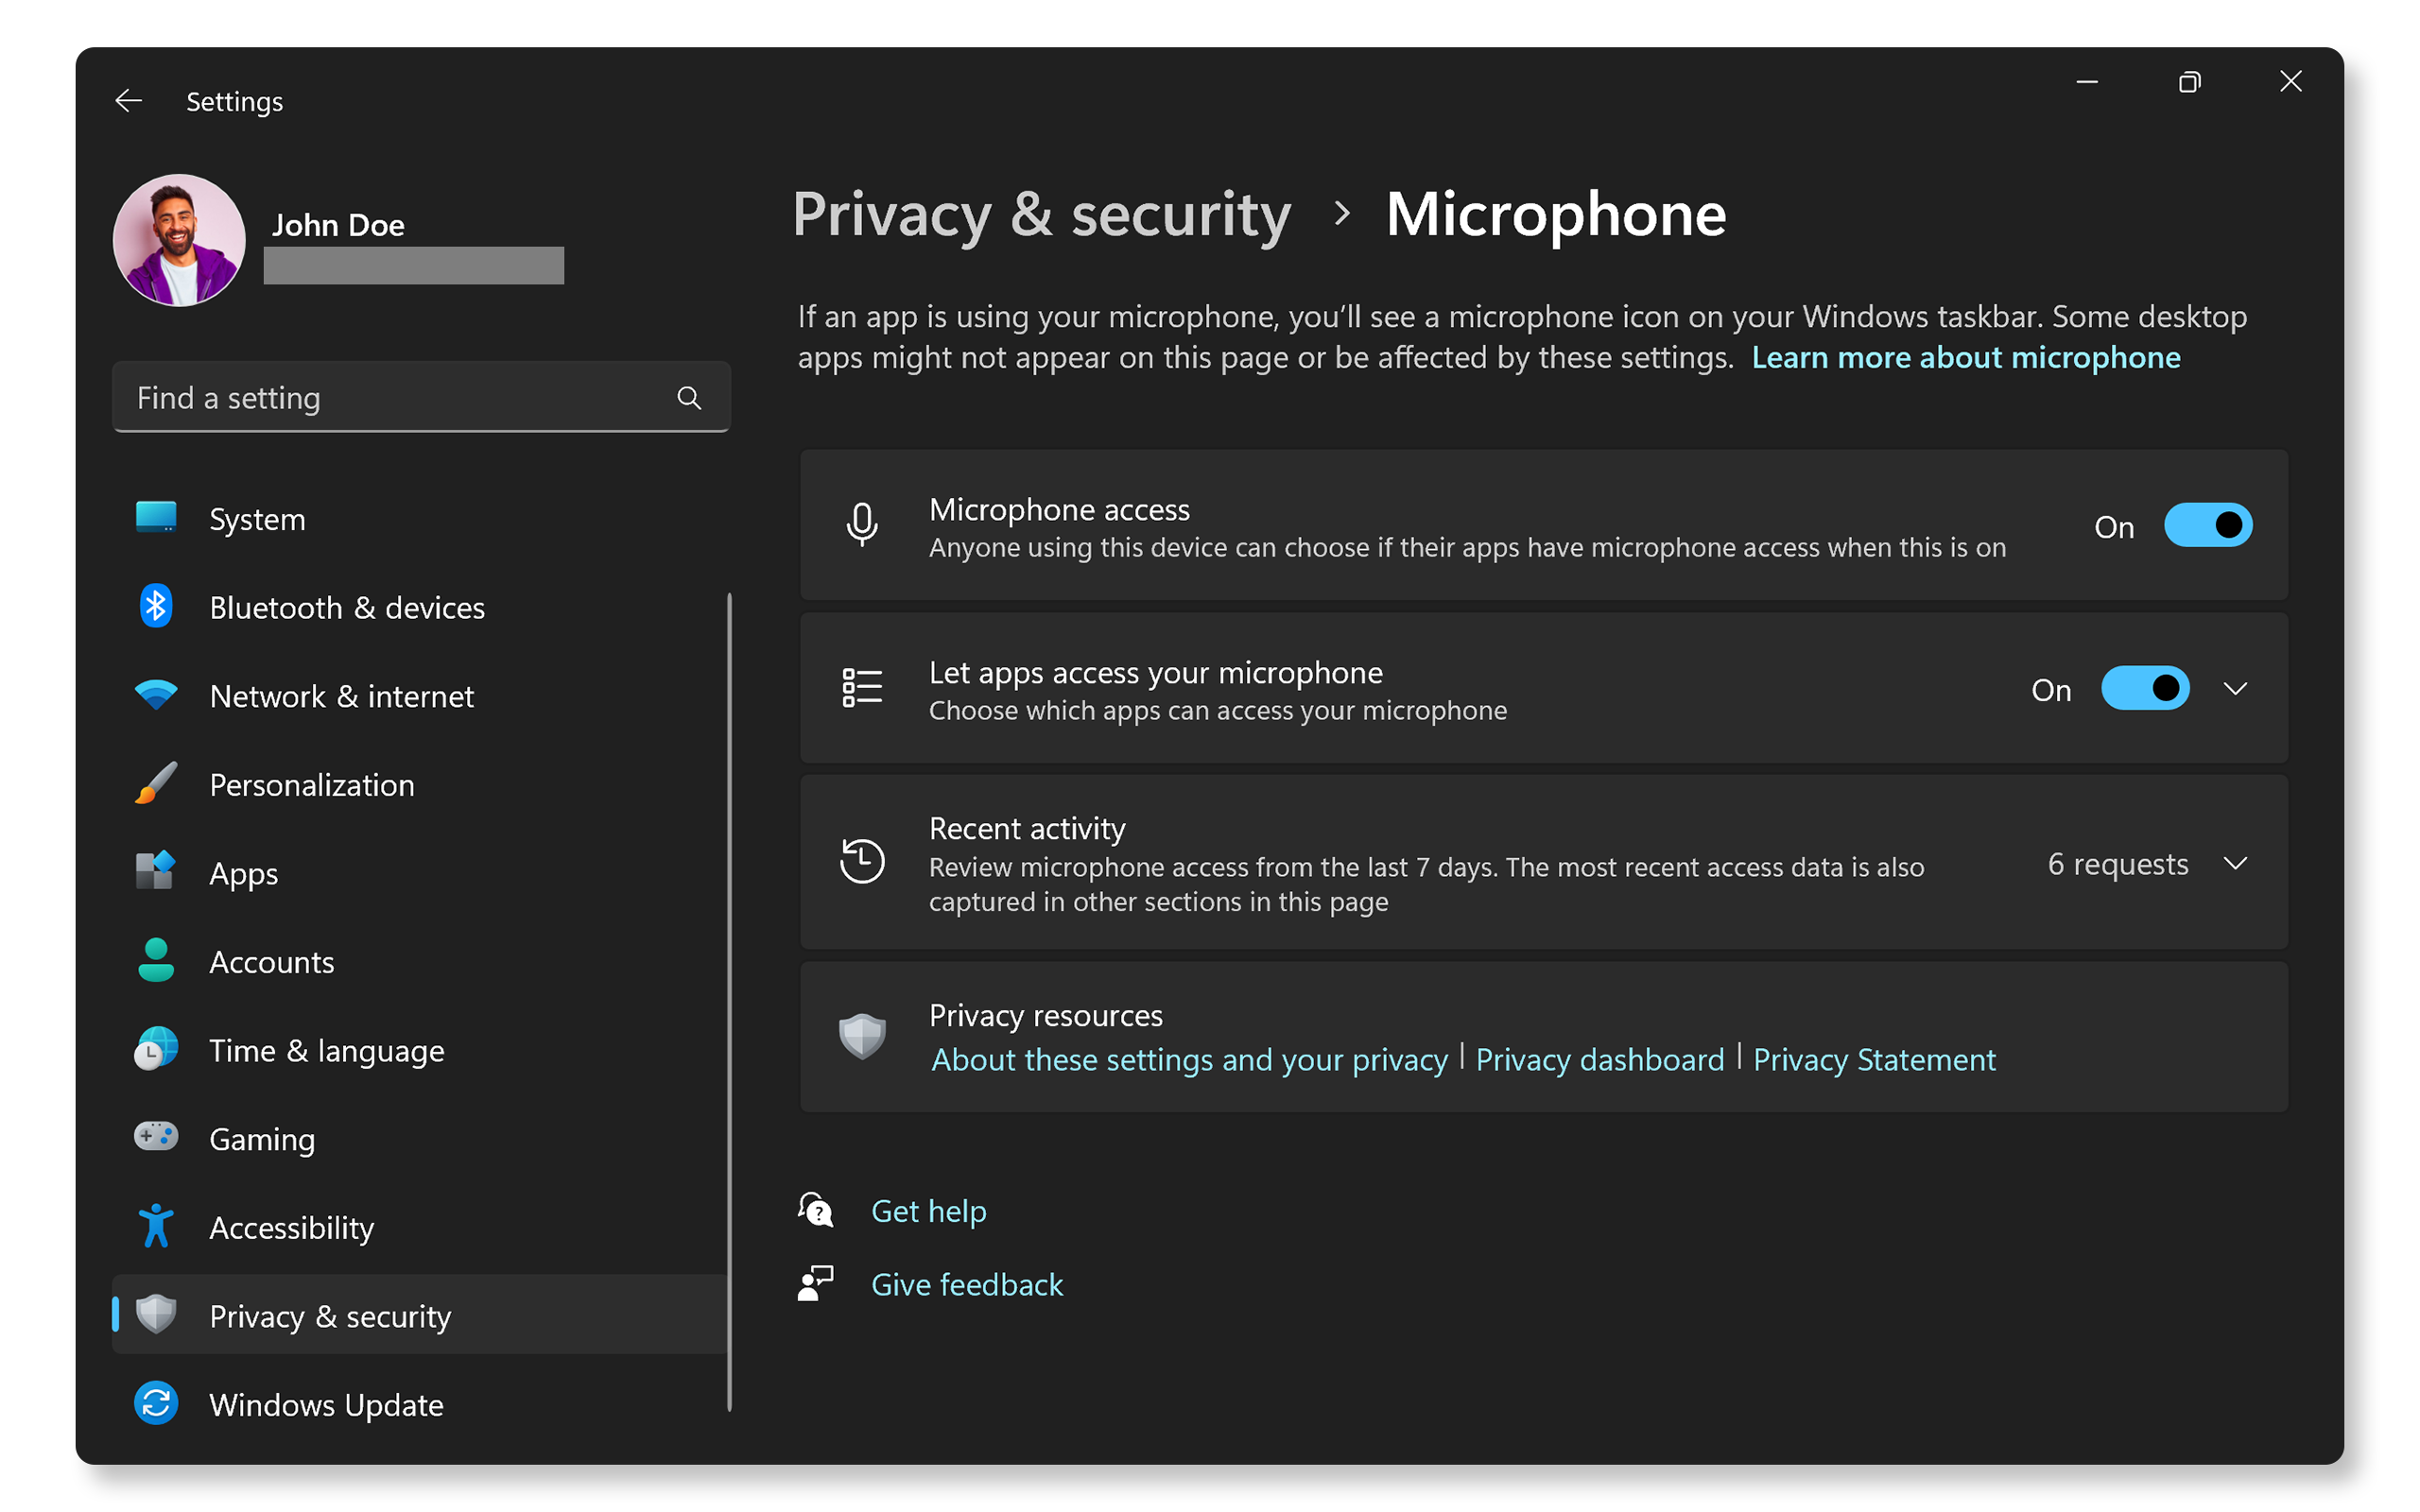
System permissions control overall microphone use. On Windows, go to Privacy > Microphone. On Mac, open System Preferences > Security & Privacy > Privacy tab.
Check that the system allows apps to access the microphone. Sometimes, permissions reset after an update or change. Re-enable permissions if needed to restore microphone function.
Credit: www.drivereasy.com
Disable Audio Enhancements
Audio enhancements sometimes cause microphone issues on laptops. These features change sound settings automatically. Disabling them can help fix microphone problems quickly.
Turning off audio enhancements stops sound effects that may block your mic. Resetting audio settings returns everything to default. Both steps often solve microphone glitches.
Turn Off Sound Effects
Open the Sound settings on your laptop. Select the Recording tab to see your microphone. Right-click your mic and choose Properties. Click the Enhancements tab. Check the box that says Disable all sound effects. Click Apply and then OK. Test your microphone again. This step often clears problems caused by extra audio effects.
Reset Audio Settings
Go to the Sound Control Panel. Find your microphone under the Recording tab. Select it and click Properties. Move to the Advanced tab. Click Restore Defaults. Press Apply to save changes. This resets all audio settings to their original state. It can fix hidden conflicts that stop your mic from working well.
Test Microphone With Different Apps
Testing your microphone with different apps helps find the exact problem. Some apps use the microphone differently. Testing multiple apps shows if the issue is with the mic or the software.
Use Voice Recorder
Open the Voice Recorder app on your laptop. Speak clearly into the microphone. Record a short audio clip. Play it back to check the sound quality. No sound means the mic may be faulty or disabled. If the sound is clear, the mic works fine.
Try Video Conferencing Software
Launch a video conferencing app like Zoom or Skype. Join a test call or a meeting. Speak and watch the microphone icon for activity. If the icon lights up, the mic is working. No activity means the app cannot detect the mic. Try changing the microphone settings inside the app.
Credit: www.dell.com
Perform System Updates
Performing system updates can solve many laptop problems, including microphone issues. Updates often include fixes for bugs that stop hardware from working right. Keeping your system updated ensures your laptop runs smoothly and hardware like your microphone works correctly.
Install Latest Os Updates
Check your laptop for the newest operating system updates. Updates improve system stability and device compatibility. Open your settings and look for the update section. Download and install all available updates. These updates may fix microphone driver problems automatically.
Restart Laptop After Updates
After installing updates, restart your laptop. Restarting helps apply changes fully. It refreshes system files and drivers. Your microphone might start working after a reboot. Always restart your laptop to complete the update process.
Reset Audio Services
Resetting audio services can fix many microphone problems on a laptop. Sometimes, these services stop working or freeze, causing the microphone to fail. Restarting them refreshes the system and restores sound functions.
This method is simple and takes only a few minutes. It does not require special tools or software. Follow these steps carefully to reset your audio services and get your microphone working again.
Restart Windows Audio Service
Press Windows + R keys to open the Run box. Type services.msc and press Enter. Find Windows Audio in the list. Right-click it and select Restart. Wait a few seconds for the service to restart. This refreshes the audio system and often fixes microphone issues.
Check Related Background Processes
Open Task Manager by pressing Ctrl + Shift + Esc. Look for AudioSrv and RpcSs processes. Ensure they are running. If not, right-click and choose Start. These processes support audio services. Restarting or starting them helps fix microphone problems quickly.
Frequently Asked Questions
Why Is My Laptop Microphone Not Working?
Your laptop microphone may be disabled, muted, or have driver issues. Check settings, update drivers, and ensure the mic is enabled.
How Do I Enable My Laptop Microphone?
Go to Sound settings, select Input devices, and enable your microphone. Also, check app permissions for microphone access.
How To Update Microphone Drivers On A Laptop?
Open Device Manager, find your microphone under Audio inputs, right-click, and select Update driver. Restart your laptop afterward.
Can Antivirus Software Block My Microphone?
Yes, some antivirus programs may block microphone access. Check your antivirus settings to allow microphone use.
Conclusion
Fixing a laptop microphone often needs simple steps. Check settings first and ensure the mic is not muted. Updating drivers can also solve many issues. Testing the microphone after changes helps confirm the fix. Regular checks keep your device ready for calls or recordings.
Small efforts save time and frustration later. Keep these tips handy for quick microphone troubleshooting. Your laptop’s sound will work well again.