How to Fix No Sound on Headphones Windows

Are you frustrated because your headphones suddenly stopped working on your Windows computer? You’re not alone, and the good news is that this problem can usually be fixed quickly.
Whether you’re trying to listen to music, join a video call, or watch a movie, no sound from your headphones can be a real headache. But don’t worry—this guide will walk you through simple, step-by-step solutions that anyone can follow.
Keep reading, and you’ll have your sound back in no time.

Credit: www.youtube.com
Check Basic Connections
Before diving into complex solutions, start by checking the basic connections. Many times, no sound on headphones happens because of loose or faulty connections. This step is simple and fast.
Make sure the headphones plug fits well into the computer. Check the wires for any visible damage. These checks can save time and avoid frustration.
Inspect Headphone Jack
Look closely at the headphone jack on your Windows PC. Dust or dirt can block the connection. Use a soft cloth or compressed air to clean it gently.
Check if the jack is loose or damaged. A loose jack can cause sound issues. Try plugging in the headphones firmly to feel a click or secure fit.
Test With Another Device
Plug your headphones into another device, like a phone or tablet. This test helps find out if the headphones are the problem.
If no sound comes from the other device, the headphones might be broken. Try using a different pair of headphones on your Windows PC to see if the sound works.
Verify Audio Settings
Checking your audio settings is the first step to fix no sound on headphones in Windows. Sometimes, the problem comes from wrong device settings or low volume. Windows might use speakers instead of headphones, or the sound might be muted. Follow these simple steps to verify your audio settings and get sound back on your headphones quickly.
Set Headphones As Default Device
Open the Sound settings on your PC. Click the speaker icon in the taskbar. Select “Open Sound settings.”
Under “Output,” find your headphones in the list. Click on your headphones to select them. Then, click “Set as Default.” This makes sure Windows sends sound to your headphones, not other devices.
If your headphones do not appear, unplug and plug them back in. Sometimes, Windows needs a moment to recognize new devices.
Adjust Volume Levels
Check the volume slider in the Sound settings. Make sure it is not at zero or muted. Increase the volume to a comfortable level.
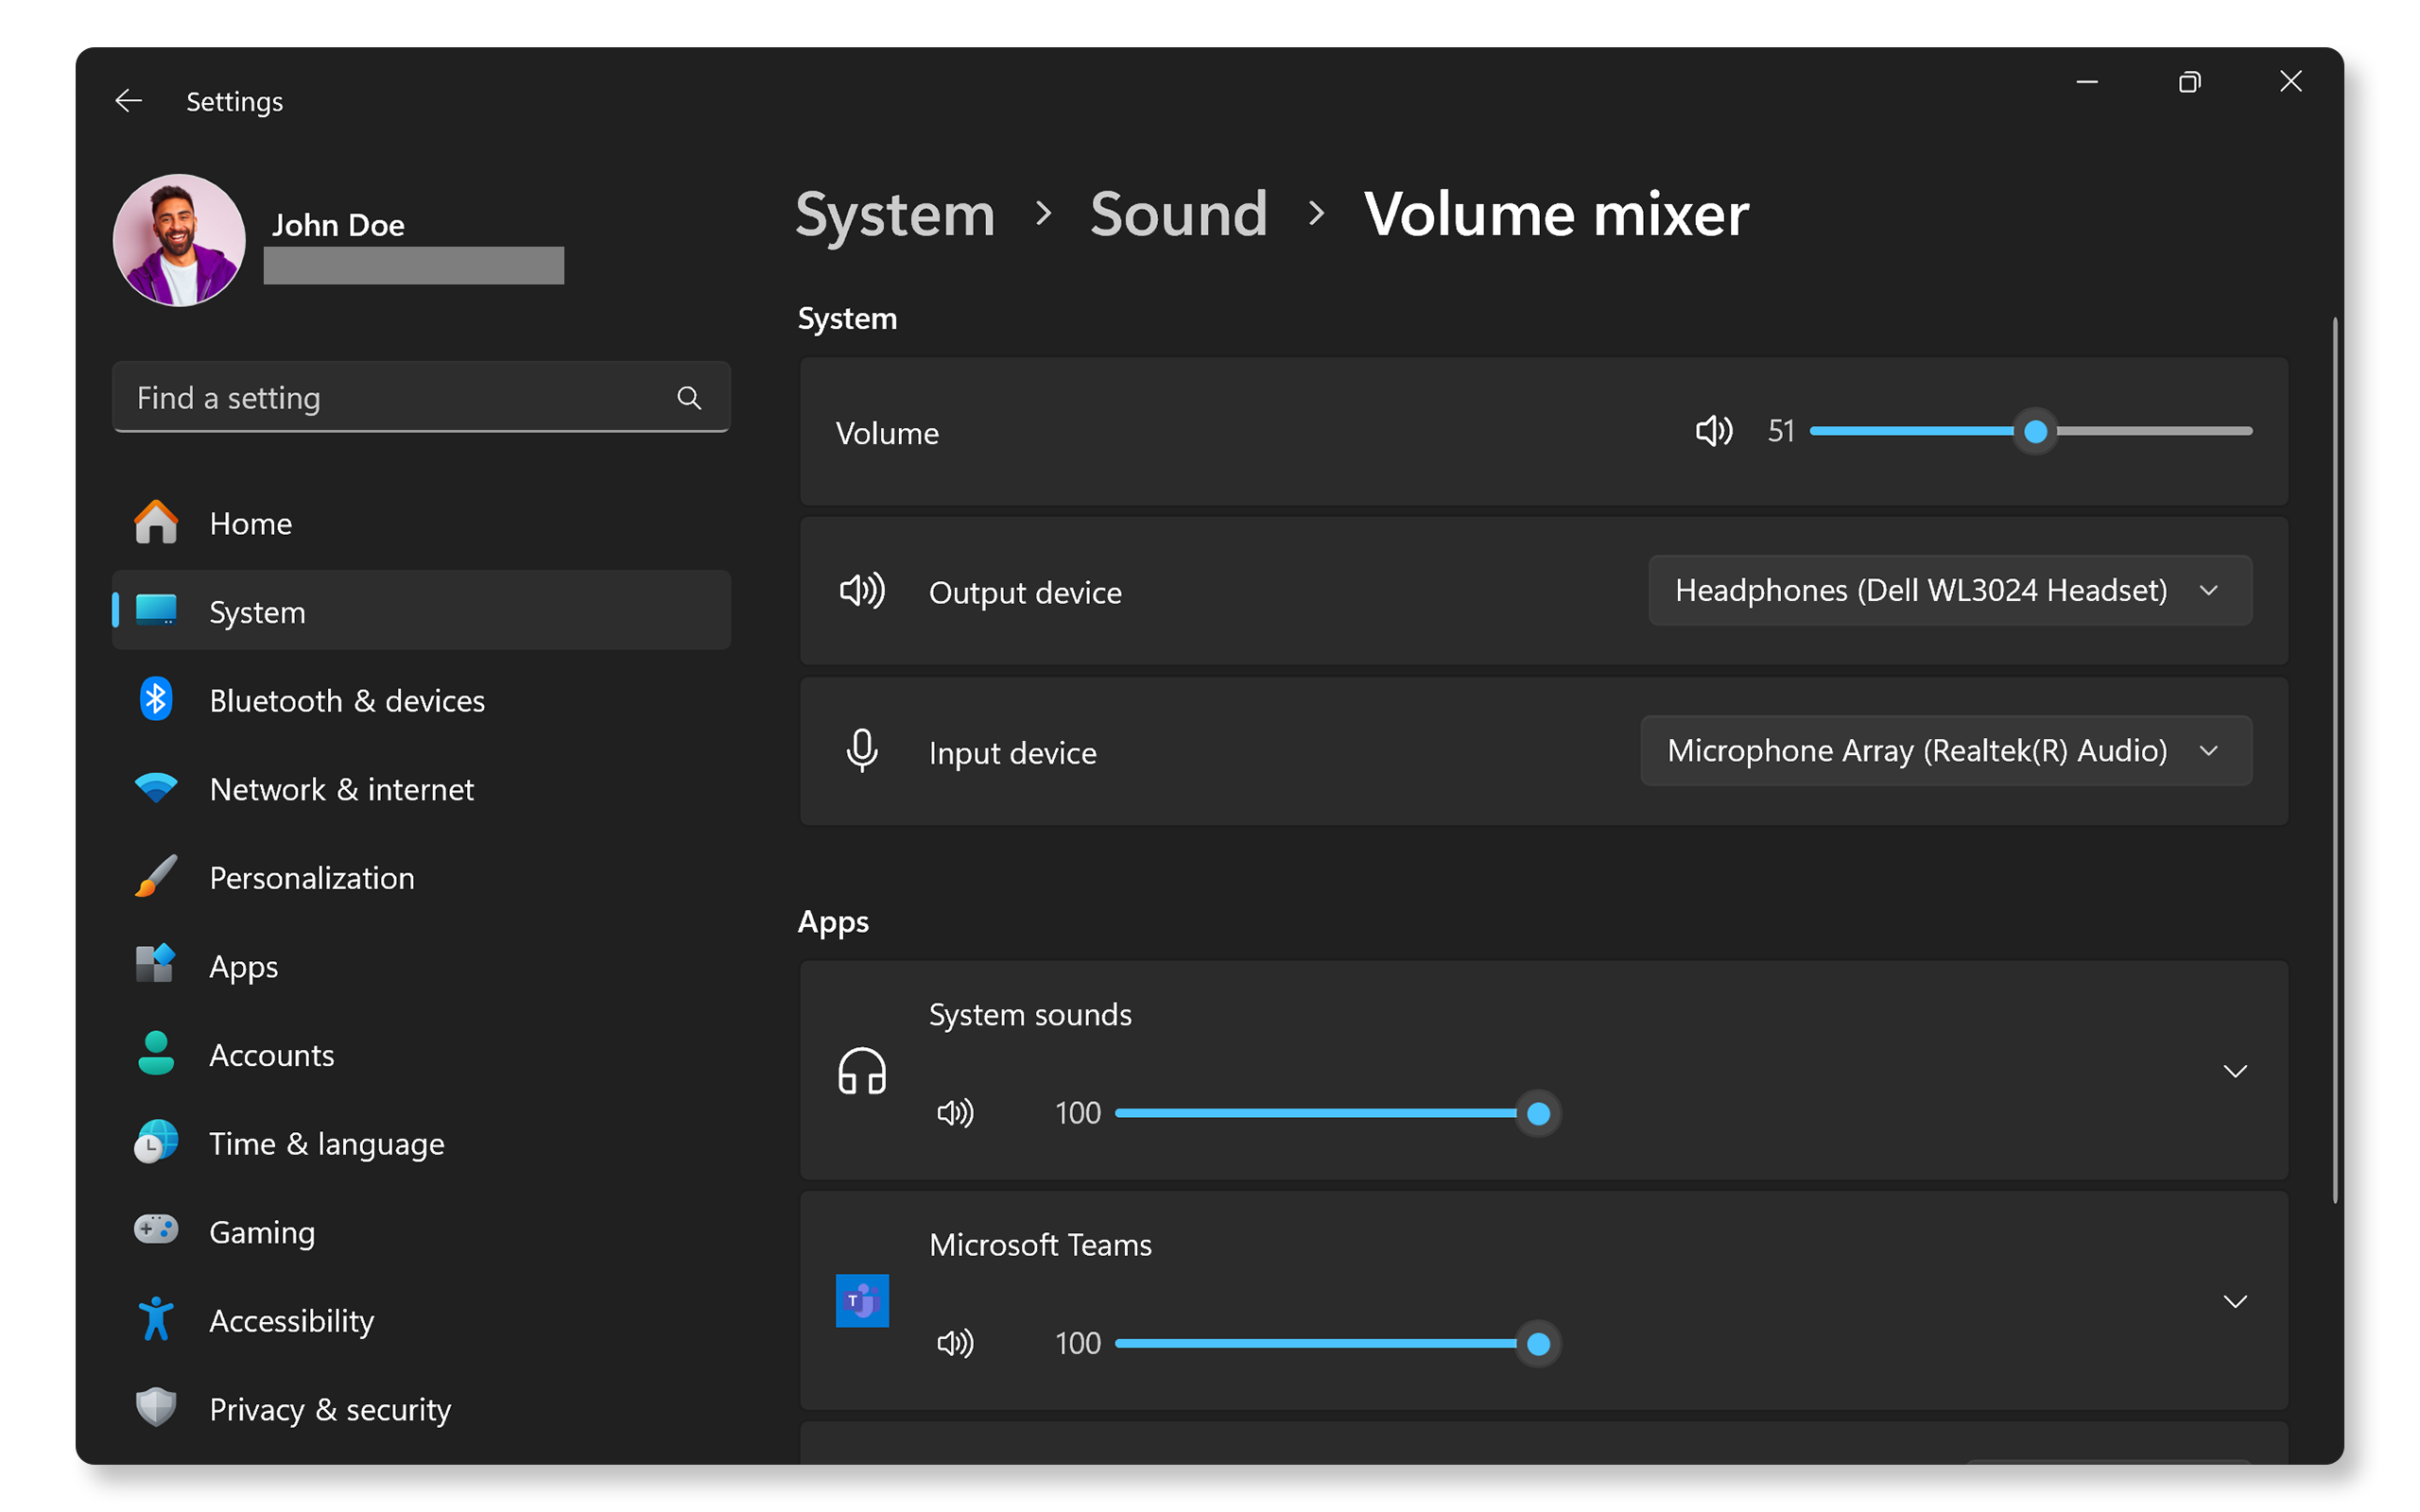
Also, right-click the speaker icon and open “Volume Mixer.” Check if the app you use has sound enabled. Sometimes, apps have their own volume control separate from the main volume.
Test the sound after adjusting these settings. You should hear audio through your headphones now.
Update Or Reinstall Audio Drivers
Audio drivers connect your headphones to your Windows computer. Outdated or damaged drivers can cause no sound issues. Updating or reinstalling these drivers often fixes the problem. It ensures your system and headphones communicate well.
Follow simple steps to update or reinstall audio drivers. You can do this using Device Manager or by downloading drivers from the manufacturer’s website. Both methods are effective in resolving sound problems.
Use Device Manager
Open Device Manager by typing it in the Start menu. Find “Sound, video and game controllers” and expand it. Right-click your audio device and choose “Update driver.”
Next, select “Search automatically for updated driver software.” Windows will look for the latest driver online. Wait for the process to finish.
If updating does not help, try reinstalling the driver. Right-click the audio device and select “Uninstall device.” Restart your computer. Windows will reinstall the driver automatically.
Download Drivers From Manufacturer
Visit the official website of your headphone or computer brand. Look for the support or downloads section. Enter your model number to find the correct audio driver.
Download the latest driver version compatible with your Windows system. Run the installer and follow the on-screen instructions. Restart your computer after installation.
This method ensures you have the exact driver needed for your device. It helps solve sound problems that automatic updates might miss.
Run Windows Audio Troubleshooter
Running the Windows Audio Troubleshooter helps find sound problems fast. It checks settings and fixes common audio issues automatically. This tool is easy to use and does not require extra software.
Using the troubleshooter can save time and avoid complex steps. It works well for headphone sound problems on Windows. Follow the steps below to run the troubleshooter and fix no sound on headphones.
Open Windows Settings
Click the Start button on the taskbar. Select the gear icon to open Settings. This opens the main control panel for Windows options.
Navigate To Troubleshoot Section
In Settings, click on “System”. Scroll down and find “Troubleshoot”. Click on it to see the troubleshooting tools available.
Select And Run Audio Troubleshooter
Under Troubleshoot, click “Other troubleshooters”. Find “Playing Audio” in the list. Click the “Run” button next to it to start the tool.
Follow The Troubleshooter Instructions
The tool will ask questions about your audio problem. Answer them as clearly as possible. It will then scan and try to fix any detected issues.
Check Headphone Sound Again
After the troubleshooter finishes, test your headphones. Play some audio to see if the sound works. If not, try the tool again or check other settings.
Check For Windows Updates
Checking for Windows updates is a simple way to fix no sound issues on headphones. Updates often include fixes for audio problems. Keeping Windows up to date ensures your system runs smoothly and hardware works well.
Sometimes, outdated drivers or system files cause sound errors. Updates can replace these files with newer versions. This helps your headphones connect and play sound correctly.
How To Check For Windows Updates
Open the Start menu and select Settings. Click on “Update & Security.” Choose “Windows Update” from the side menu. Click the “Check for updates” button. Windows will search for available updates.
Installing Updates
After Windows finds updates, click “Download” or “Install now.” Wait for the process to finish. Restart your computer if prompted. This step applies any fixes that may solve headphone sound issues.
Why Updates Fix Headphone Sound Problems
Updates improve audio drivers and system files. They fix bugs that block sound output. Updates also add support for new hardware. This helps your headphones work with the latest Windows version.
Credit: www.avast.com
Disable Audio Enhancements
Audio enhancements can sometimes cause problems with headphone sound on Windows. These features try to improve audio quality but can also create issues. Disabling audio enhancements often fixes no sound problems quickly.
This step is simple and does not affect normal sound settings. It helps to find out if these enhancements cause the issue.
Open Sound Settings
Right-click the speaker icon on the taskbar. Select “Sounds” from the menu. This opens the Sound settings window where you can manage playback devices.
Select Your Headphones
In the Playback tab, find your headphones. Click on them to highlight. Then click the “Properties” button at the bottom right.
Go to the Enhancements tab in the Properties window. Check the box that says “Disable all enhancements.” Click “Apply” and then “OK.”
Test Your Headphones
Play some audio to check if the sound works. Disabling enhancements often restores sound on headphones. Repeat if necessary for other devices.
Inspect Sound Control Panel Settings
Inspecting the Sound Control Panel settings is a key step to fix no sound on headphones in Windows. Sometimes, the problem lies in the system settings rather than the hardware. Adjusting these settings can restore audio quickly.
This section guides you through checking playback devices and testing headphone properties. Both help identify and solve common sound issues.
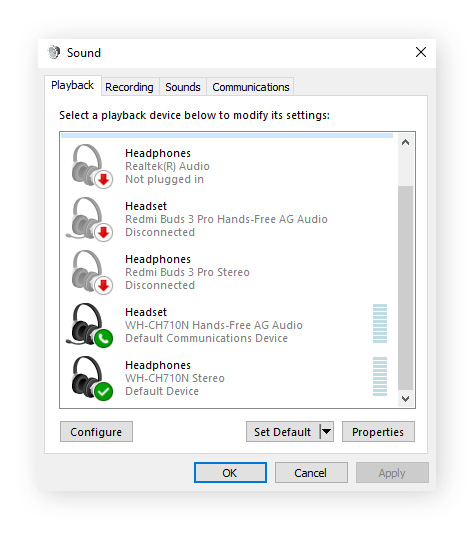
Check Playback Devices
Open the Sound Control Panel by right-clicking the speaker icon in the taskbar. Select “Sounds” and go to the “Playback” tab. Here, you see all audio devices connected to your PC.
Make sure your headphones appear on the list. If they do not, try unplugging and plugging them back in. Right-click the empty space and select “Show Disabled Devices.” If your headphones are disabled, enable them by right-clicking and choosing “Enable.”
Select your headphones and click “Set Default” to make them the main playback device. This ensures sound is routed through your headphones. Click “OK” to save changes.
Test Headphone Properties
In the Playback tab, select your headphones and click “Properties.” Switch to the “Levels” tab to check the volume. Make sure it is not muted or too low.
Go to the “Advanced” tab and check the default format. Use a common setting like 44100 Hz or 48000 Hz. Click “Test” to play a sound and verify audio output.
Adjust any settings that seem incorrect. After finishing, click “Apply” and then “OK” to confirm. Testing headphone properties helps detect hidden problems.
Try Different Usb Or Bluetooth Headphones
Trying different USB or Bluetooth headphones helps find the source of sound issues. This step checks if the problem is with your headphones or the computer. It narrows down what needs fixing quickly.
Use another USB headphone to test your PC’s USB ports. Sometimes, a single port might not work properly. Testing multiple ports can identify the faulty one.
Bluetooth headphones need pairing with your device. Testing different Bluetooth headphones checks if the problem is with the Bluetooth connection or the headphones themselves.
Test Another Usb Headphone
Plug a different USB headphone into your computer. Check if sound plays through it. If it works, your first headphone might be broken. If not, the problem may be with your USB ports or drivers.
Try Different Bluetooth Headphones
Pair another Bluetooth headphone with your Windows PC. Listen for any sound output. If sound works, the original headphone could have connection issues. If no sound plays, the Bluetooth settings or drivers need review.
Check Usb And Bluetooth Ports
Try headphones on different USB ports or Bluetooth connections. Faulty ports cause no sound problems. Cleaning or repairing these ports can restore sound output.
Reset Windows Audio Service
Resetting the Windows Audio Service can solve headphone sound problems. This service controls all sound functions in Windows. Sometimes, it stops working properly and causes no sound issues.
Restarting this service is quick and does not need special skills. It refreshes the audio system and often fixes sound errors.
Open The Services App
Press Windows + R keys to open the Run box. Type services.msc and press Enter. The Services window will open. This app lists all Windows services, including audio.
Locate Windows Audio Service
Scroll down and find Windows Audio in the list. This service manages sound playback on your PC. Right-click it to see options.
Restart The Windows Audio Service
Click Restart from the menu. This stops and then starts the service again. Wait a few seconds for the process to finish. This can fix stuck or frozen audio services.
Check Dependencies
Right-click Windows Audio and select Properties. Go to the Dependencies tab. Make sure all dependent services are running. Restart them if needed.
Test Your Headphones
After restarting the service, plug in your headphones. Play any audio file or video. Check if the sound works now. This simple step often restores headphone audio.
Credit: www.dell.com
Frequently Asked Questions
Why Is There No Sound On My Headphones Windows?
No sound on Windows headphones usually means a driver or connection issue. Check audio settings, update drivers, and ensure headphones are properly plugged in.
How Do I Fix Headphones Not Detected On Windows?
Ensure headphones are correctly connected. Update or reinstall audio drivers via Device Manager. Restart Windows and check sound settings for the default playback device.
Can Audio Settings Cause No Sound On Headphones?
Yes, incorrect audio settings can mute headphones. Verify volume levels, default playback device, and disable audio enhancements in Sound Control Panel.
How To Update Headphone Drivers On Windows?
Open Device Manager, find sound devices, right-click your headphones, and select “Update driver. ” Choose automatic update to download the latest drivers from Windows.
Conclusion
Fixing no sound on headphones in Windows can be simple. Check your connections and volume settings first. Make sure the right device is set as default. Update your audio drivers regularly. Restarting your computer often helps too. These steps cover most common sound issues.
Keep calm and try each solution one by one. Your headphones will work again soon. Enjoy clear sound without frustration.