How to Fix Small Roof Leak near Chimney Area

A small roof leak near your chimney might seem harmless at first, but if left unchecked, it can cause serious damage to your home. You might be wondering how to find the exact spot or whether you can fix it yourself without calling a costly professional.
The good news is, with a few simple steps, you can stop that leak quickly and protect your home from water damage. Keep reading, and you’ll learn easy, effective ways to fix the leak near your chimney before it turns into a bigger problem.
Identify The Leak Source
Finding the exact source of a roof leak near the chimney is the first step to fix it. Leaks can hide in small cracks or damaged parts. Careful inspection helps save time and money later. Focus on areas where water can enter easily. Use a flashlight if needed to see dark spots clearly.
Check Flashing And Sealant
Flashing is the metal strip around the chimney. It keeps water from seeping in at the joints. Look for cracks, rust, or loose edges on the flashing. Check the sealant or caulk for gaps or dryness. Old or cracked sealant cannot stop water well. Replace damaged flashing or reseal to stop leaks.
Inspect Roof Shingles
Shingles near the chimney can lift or break over time. Look for missing, curled, or cracked shingles. Damaged shingles let water pass under them. Remove debris like leaves or branches that block water flow. Replace any shingles that look worn out or broken.
Look For Water Stains Inside
Water stains on attic walls or ceilings show leak spots. Stains often appear as brown or yellow patches. Check the area above and around the chimney inside the attic. Damp or moldy spots suggest ongoing leaks. Spotting stains helps find the exact leak location faster.

Credit: jkroofing.com
Gather Necessary Tools And Materials
Before fixing a small roof leak near the chimney, gather all necessary tools and materials. This step saves time and avoids interruptions during repairs. Having the right items ensures a safe and effective job.
Roofing Cement And Sealant
Roofing cement and sealant stop water from entering the roof. They fill cracks and gaps near the chimney. Choose a high-quality, weather-resistant sealant. This material sticks well to shingles and chimney surfaces.
Replacement Shingles
Damaged shingles cause leaks near the chimney. Carry extra shingles that match your roof’s style and color. Replacement shingles cover broken or worn-out spots. They restore the roof’s protection against rain and wind.
Protective Gear
Safety is important during roof repairs. Wear gloves to protect your hands from sharp edges. Use non-slip shoes for better grip on the roof. A helmet and safety glasses shield your head and eyes from debris.
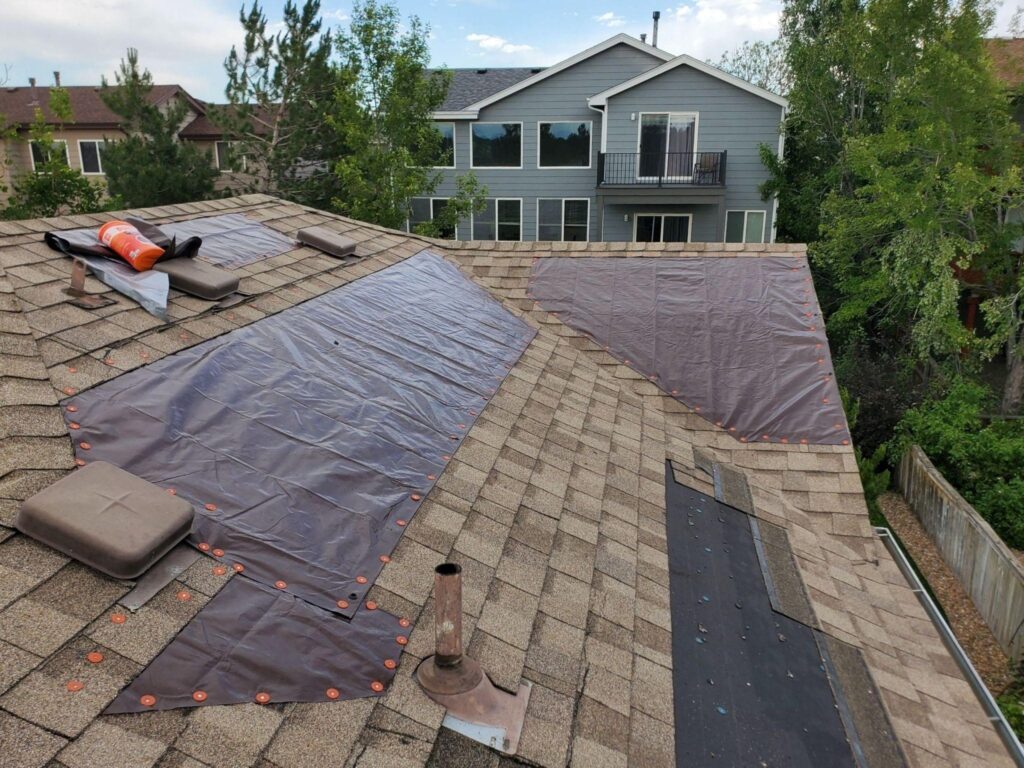
Prepare The Roof Area
Preparing the roof area is the first step to fix a small leak near the chimney. A clean and dry surface helps the repair materials stick better. This step makes the patch last longer and prevents new leaks.
Start by removing any loose dirt or debris around the chimney. Then, dry the surface completely. These simple actions create the best conditions for a strong repair.
Clean Debris And Dirt
Clear all leaves, dust, and old roofing material near the leak. Use a broom or brush to sweep the area gently. Make sure no loose particles remain. Dirt can stop sealants from bonding well. Cleaning helps you see the damage clearly.
Dry The Surface Thoroughly
Use a cloth or towel to wipe away moisture. Let the area air dry if needed. Water weakens adhesives and causes patches to peel off. A dry roof surface ensures the repair sticks firmly and lasts longer.
Repair Flashing And Sealant
Repairing the flashing and sealant near the chimney is key to stopping small roof leaks. Flashing protects the roof where it meets the chimney. Sealant fills gaps to keep water out. Fixing these parts helps prevent water damage inside the house.
Remove Damaged Sealant
Start by scraping off old, cracked sealant around the flashing. Use a putty knife or scraper. Removing damaged sealant ensures new material sticks well. Clean the area from dirt and debris. A clean surface helps the sealant bond tightly.
Apply New Roofing Cement
Spread roofing cement around the flashing edges. Use a putty knife to smooth it out evenly. The cement fills gaps and seals cracks. It creates a waterproof barrier that stops leaks. Apply enough cement to cover all exposed areas.
Secure Flashing With Nails
Check the flashing for loose or missing nails. Use galvanized roofing nails to fix it in place. Nail the flashing securely to the roof deck. Properly secured flashing prevents water from seeping under. Be careful not to damage the flashing while nailing.
Replace Damaged Shingles
Replacing damaged shingles near the chimney stops roof leaks fast. Shingles protect your roof from water and weather. Broken or missing shingles let water seep under and cause damage. Fixing this part of the roof keeps your home dry and safe.
Lift Surrounding Shingles
Start by lifting shingles around the damaged area. Use a flat tool like a pry bar carefully. Lift the nails holding the shingles without breaking them. This step gives you space to remove the broken shingles below.
Remove Broken Shingles
Take out the damaged shingles gently. Pull out nails or fasteners holding them in place. Clear away any debris or old roofing cement. Make sure the surface is clean and flat for the new shingles.
Install New Shingles Properly
Place new shingles in the empty spot. Align them with the existing shingles for a smooth look. Nail them down securely, but avoid over-driving nails. Cover nail heads with roofing cement to stop leaks.
Test For Leak Fix
Testing for a leak fix near the chimney is a key step after repair. It helps confirm if the problem is solved or still needs attention. This process is simple but must be done carefully. Proper testing saves time and prevents further damage. Follow these steps to check the repair effectively.
Use Hose To Simulate Rain
Use a garden hose to mimic rain near the chimney. Spray water steadily over the repaired area for 10 to 15 minutes. Keep the water flow gentle but consistent. Avoid strong jets that can cause new leaks. This simulates natural rain and checks if the leak returns.
Check Inside For Moisture
After spraying water, inspect the attic or space inside. Look closely for any signs of moisture or water stains. Use a flashlight to help see dark corners. Touch walls and beams to feel for dampness. No wet spots mean the leak is fixed successfully.
Prevent Future Leaks
Preventing future leaks near your chimney is important to keep your roof strong. Small leaks can turn into big problems if ignored. Taking some simple steps helps protect your home and saves money.
Regular Roof Inspections
Check your roof at least twice a year. Look for cracked shingles or damaged areas around the chimney. Early detection stops small issues from growing. Use a sturdy ladder and be careful. If unsure, hire a professional inspector. They find hidden problems fast.
Maintain Chimney Flashing
Flashing seals the joint between the chimney and roof. It stops water from slipping inside. Check flashing for rust, cracks, or lifting edges. Tighten or replace loose parts right away. Proper flashing keeps water out and your attic dry.
Trim Nearby Tree Branches
Branches can rub against the roof and damage shingles. They also drop leaves and debris near the chimney. Trim trees to keep branches away from your roof. This reduces wear and prevents clogs in gutters. Clean gutters help water flow off the roof easily.
Credit: jkroofing.com

Credit: cdroofingltd.com
Frequently Asked Questions
How Do I Identify A Small Roof Leak Near Chimney?
Check for water stains, mold, or dampness around the chimney. Inspect flashing and shingles for cracks or gaps. Look inside the attic for moisture or daylight showing through. Early detection helps prevent further damage and costly repairs.
What Materials Are Needed To Fix A Chimney Roof Leak?
You will need roofing cement, a putty knife, replacement flashing, roofing nails, and waterproof sealant. Safety gear like gloves and a ladder is essential. These materials help seal gaps and reinforce the chimney’s waterproof barrier.
Can I Fix A Chimney Leak Without Professional Help?
Yes, small leaks can be fixed DIY with proper tools and knowledge. Carefully clean and seal cracks or replace damaged flashing. However, for extensive damage or safety concerns, hire a professional roofer for best results.
How Long Does It Take To Repair A Small Chimney Roof Leak?
Typically, repairs take 1 to 3 hours depending on leak severity. Simple sealing or flashing replacement is quick. Complex issues may need more time. Timely repairs prevent further roof damage and save money.
Conclusion
Fixing a small roof leak near the chimney can save you money. Act quickly to stop water damage inside your home. Check the flashing and seal any gaps you find. Regular roof inspections help catch leaks early. Small repairs prevent bigger problems later.
Keep your home dry and safe with simple steps. Stay alert to any signs of leaks around your chimney. Taking care of your roof protects your whole house.